


Before we begin, It is good to note that this article is intended not to use some of the supportive frameworks, which most of them will perform most of the work without developer much efforts, so it is good to say it is intended to focus on the core technologies just for the purpose of learning. Let's dive in.
Setups and Configurations
I will be using window 10 for this tutorial but I believe most of the important steps will be the same in other OS like ubuntu, Mac etc.
First we need to Download and install Java 8, Apache Maven, Tomcat 8 Server and Visual Studio Code(VSC) IDE into your system. Make sure to follow the proper procedural on installing all the mentioned technologies.
After the Installation of the above we need to set working platform by adding some extensions to VSC that will assist us in creating out project.
Let's Install the Visual Studio extension pack for java in the VSC by hold (CTRL + SHIFT + X) inside VSC and type vscode:extension/vscjava.vscode-java-pack.

Create Maven Project
Now is time to create a maven project, create a folder to your desired location which will be used for your project.
From the Command Palette (Crtl+Shift+P) in Visual Studio Code, then
select Maven: Create Maven Project
Select maven-archetype-quickstart
Select the current vission like 1.4
Type your groupId like com.myservlet
type your artifactId like servlet
Locate your destination folder which you created before, then generate the project there.
Configure tasks file
After you successfully generate the project It is time to configure tasks file so as it can used to compile the project with maven.
Open the Command Palette (CTRL + SHIFT + P) and type and
select Tasks: Configure task then
select Create tasks.json from template.
select maven: executes common maven command.
After the above tasks.json file will be generated. Edit it like below.
tasks.json file
{
    "version": "2.0.0",
    "tasks": [
        {
            "label": "compile",
            "type": "shell",
            "command": "mvn -B compile",
            "group": "build"
        },
        {
            "label": "test",
            "type": "shell",
            "command": "mvn -B test",
            "group": "test"
        }
    ]
}
Now It's time to compile our project with maven to make sure everything is okay .
Click on Terminal on top bar then click Run Build Task and then compile
.The project will be complied with maven.
Add Dependencies
Before we start code our servlet we need to add the important dependencies for project in pom.xml file. Without this dependencies we wont be able to build our servlet.
<dependencies>
.......
<dependency>
    <groupId>javax.servlet</groupId>
    <artifactId>javax.servlet-api</artifactId>
    <version>4.0.1</version>
    <scope>provided</scope>
</dependency>
<dependency>
     <groupId>javax.servlet</groupId>
     <artifactId>jstl</artifactId>
     <version>1.2</version>
</dependency>
<dependency>
    <groupId>javax</groupId>
    <artifactId>javaee-web-api</artifactId>
    <version>8.0</version>
    <scope>provided</scope>
</dependency>
........
</dependencies>
Create Servlet
Now we are ready to start creating our servlet, We will start by deleting the default App.java file generated by the IDE inside directory src\main\java\com\myservlet\App.java.
Then we will create a new simple java class called HelloServlet.java inside directory src\main\java\com\myservlet\HelloServlet.java. The class will extend HttpServlet class.
package com.myservlet;
import java.io.IOException;
import java.io.PrintWriter;
import javax.servlet.ServletException;
import javax.servlet.annotation.WebServlet;
import javax.servlet.http.HttpServlet;
import javax.servlet.http.HttpServletRequest;
import javax.servlet.http.HttpServletResponse;

@WebServlet(urlPatterns = "/mambo.do")
public class HelloServlet extends HttpServlet {
    @Override
    protected void doGet(HttpServletRequest req, HttpServletResponse resp) throws ServletException, IOException {
        PrintWriter out = resp.getWriter();
        out.println("<html>");
        out.println("<head>");
        out.println("<title>");
        out.println("</title>");
        out.println("</head>");
        out.println("<body>");
        out.println("Hello I am your Servlet ");
        out.println("</body>");
        out.println("</html>");
    }
    @Override
    protected void doPost(HttpServletRequest req, HttpServletResponse resp) throws ServletException, IOException {
    }
}
NB: Make sure to remove the autogenerated stub super in overridden methods if they exist
// TODO Auto-generated method stub
        super.doGet(req, resp);
// TODO Auto-generated method stub
        super.doPost(req, resp);
Delete them unless otherwise you will get an error: "HTTP Status 405 ? Method Not Allowed" while deploying your servelet. Like below

In order for our Servlet to work we need a mapping file for the requests to the Servlet,
the mapping file in Servlet technology is called web.xml. Some IDE generate this file automatically,
even Visual Studio Code does so, but with the help of some framework like Spring it also generate the file automatically.
But in our case we opted not to use those ways.
Create a web.xml file
Create a folder webapp under directory "src/main/webapp"
Create a folder WEB-INF under directory "src/main/webapp/WEB-INF",then
Create a file web.xml under directory "src/main/webapp/WEB-INF/web.xml"
NB: Make sure the web.xml file is properly allocated as above.
The web.xml file
<web-app xmlns="http://java.sun.com/xml/ns/javaee" xmlns:xsi="http://www.w3.org/2001/XMLSchema-instance"
    xsi:schemaLocation="http://java.sun.com/xml/ns/javaee http://java.sun.com/xml/ns/javaee/web-app_3_0.xsd"
    version="3.0">
    <display-name>To do List</display-name>
    <welcome-file-list>
        <welcome-file>mambo.do</welcome-file>
    </welcome-file-list>
</web-app>
Generate a war file
Now we need to generate a war file to test our project in a server. But before that we need to make sure the <packaging>war</packaging> in pom.xml file of your project is war like below and not jar.
 <groupId>com.myservlet</groupId>
  <artifactId>servlet</artifactId>
  <version>1.0-SNAPSHOT</version>
  <packaging>war</packaging>
Time to generate our war file, compile the project by click on Terminal on top bar of Visual Studio Code then click Run Build Task and then compile.
After compilation is finished, Go to the terminal command of your Visual Studio Code inside the directory of your project and type mvn clean project like below.
C:\Users\nyumbani-coder\Desktop\javaTechnologies\servlet>
mvn clean package
If you have correctly follow all the necesarily steps, the last output in your terminal will appear like below
[INFO] Webapp assembled in [128 msecs] [INFO] Building war: C:\Users\nyumbani-coder\Desktop\javaTechnologies\servlet\target\servlet-1.0-SNAPSHOT.war [INFO] WEB-INF\web.xml already added, skipping [INFO] ------------------------------------------------------------------------ [INFO] BUILD SUCCESS [INFO] ------------------------------------------------------------------------ [INFO] Total time: 6.710 s [INFO] Finished at: 2022-01-22T12:14:44+03:00 [INFO] ------------------------------------------------------------------------ PS C:\Users\nyumbani-coder\Desktop\javaTechnologies\servlet>
Congratulations so far you have successfully generate a war file of your servlet.
Deploy war file to local tomcat server
Because we are not using imbedded tomcat in our project but local tomcat server, then first, We need to connect our local tomcat server with our servlet application. For this tutorial we will use a Community Server Connectors to connect servlet application with tomcat.
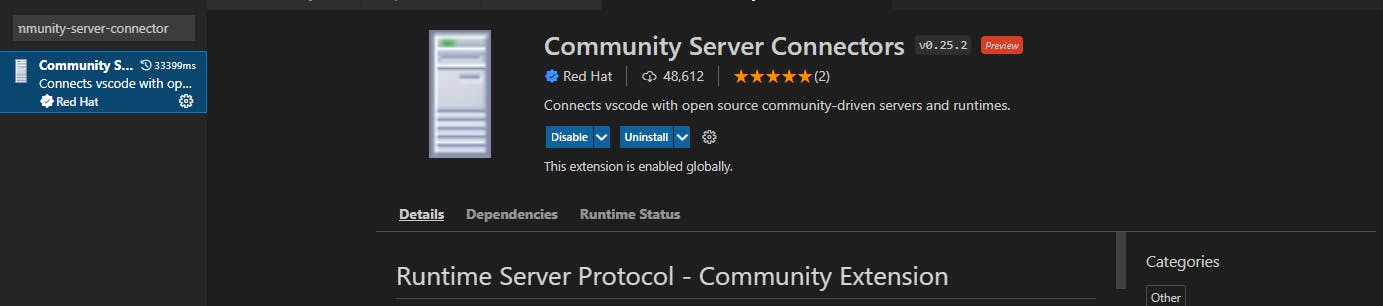
To include Community Server Connectors in our project open extensions or (CTRL + SHIFT + X) inside Visual Studio Code.
type redhat.vscode-community-server-connector and then install it.
How to use Community Server Connector with tomcat.
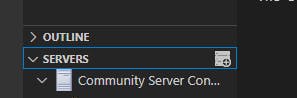
After installation of the Community Server Connector is successfully, On the left side window bar of your Visual Studio Code click on SEVERS, wait for some seconds, then you will see the Community Server Connector appears below SERVERS.
 Right click it then select
 Create New Server.
You will be asked to Download server?
If you don't have tomcat on your system then click Yes this will lead you to Download and install the tomcat you need to your system, If you have tomcat on your system already installed click No,use server on disk.
Then locate the tomcat location in your system, mine is C:\xampp\tomcat because it was installed with xampp. Click Next and Finish . After you finish to locate it in your system, It will take some second and your tomcat will appear below Community Server Connector.
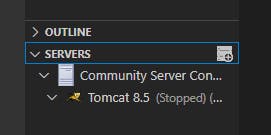
Then right click Tomcat server below Community Server Connector and click Start Server.
To check if the server works well right click the tomcat again this time click Server Actions..,
then select Show in browser and then select localhost:8080 .
The response will be as below in your selected browser

Good,
Now go back to Visual Studio Code, again Right click "Tomcat server" below "Community Server Connector" and this time click on Add Deployment select File, then locate your generated war file. Whenever you generate a war file it usually goes to directory "target" of your project.
My war file is in
"C:\Users\nyumbani-coder\Desktop\javaTechnologies\servlet\target\
servlet-1.0-SNAPSHOT.war"
You will be asked Do you want to edit optional deployment parameters Select No.
After the deployment is done you will see an icon below your tomcat server with a link to your war file like below:
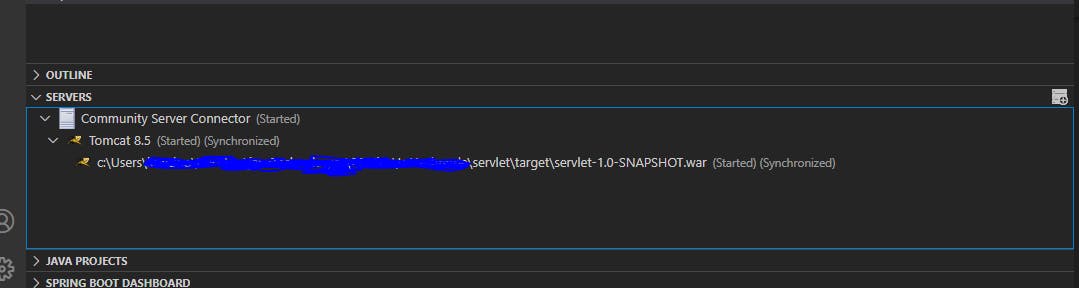
While the Server is still running, again right click "Tomcat server" below "Community Server Connector" and this time click Publish Server (Full).
To see if the war file was successfully deployed, right click the tomcat again and select Server Actions.. ,
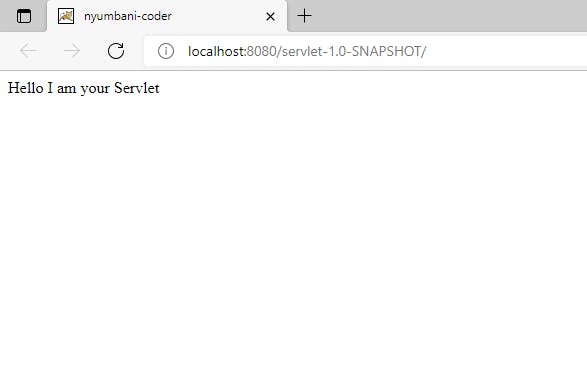
then select Show in browser and this time select localhost:8080/servlet-1.0-SNAPSHOT which is your war file, where you deployed your servlet in tomcat.
If you have followed all procedurals and everything is well set, then the response will be as below in your selected browser
 Congratulations you have managed to create your first servlet with local tomcat server and maven by using Visual Studio Code .